Inventory, stock adjustments and counts
See what is in stock by size and color, fix stock, count the store by scanning, and move stock between your stores.
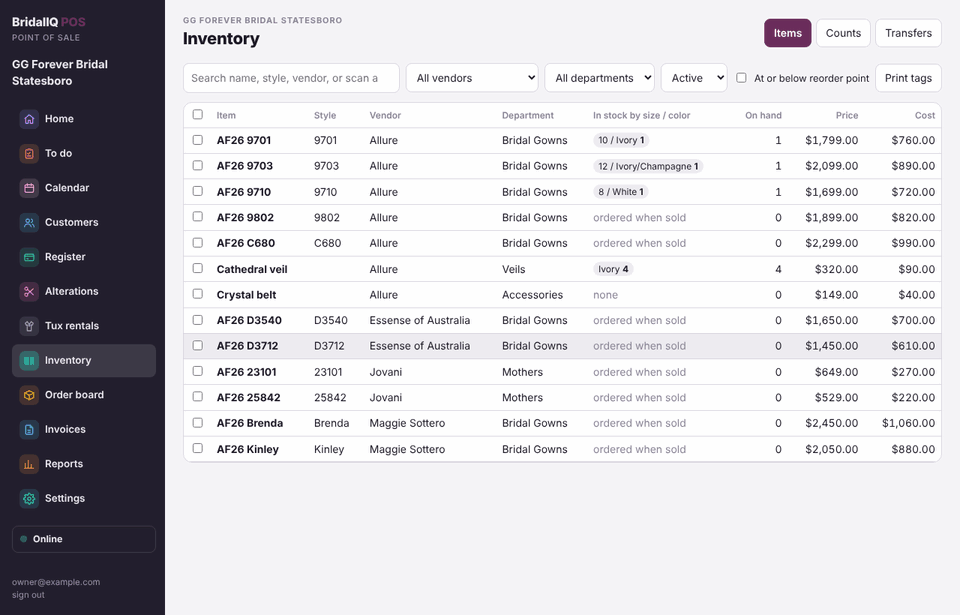
Find an item
Open Inventory and search by name, style or vendor, or scan a tag. Filter by vendor, department, active or retired, or tick At or below reorder point. Each row shows what's in stock by size and color. Staff see the price; managers and owners also see the cost.
Change an item
Managers: click an item to change its name, style, vendor, department, cost, price, season, reorder point or UPC, or mark it a floor sample. If the price doesn't match the vendor's markup, the POS says so. Retire item takes it off the register but keeps its history; Bring back undoes it.
Add or take out stock
- Managers: open the item.
- To add pieces, choose Add new pieces, enter the size, color and how many, pick a reason and add a note. Save, then print their tags.
- To take pieces out (damaged, lost, a donation), choose Take checked pieces out, then tick the pieces or scan their tags, pick a reason and save.
Every change is listed under Recent stock changes with who made it and why.
Pieces held for a bride
A piece on a bride's ticket (a special order that arrived, a layaway, something waiting for pickup) is still your stock until her ticket is paid in full. It counts in pieces on hand and inventory value, it can't go on anyone else's ticket, and its status reads Held for her name and ticket number. Managers also see her balance; staff don't. When she pays in full it reads Paid in full, is hers, and leaves your stock (listed as Paid in full (hers now) under Recent stock changes). If she owes again after a refund, it comes back as Owes again (held for her). Reports, Inventory value shows a Held for brides subtotal.
Item names
New items (from a purchase order or added by hand) are named in your store's own format, like SP26 42028 435 26. Owners and managers set it in Settings, Item names.
- The card shows the format it found in your items, or the one you saved, and how many of your recent items follow it.
- Change the Format using the pieces listed under it, such as
{season},{yy},{styleno}and{cost}. The Example shows what a name will look like. - Set your Spring code and Fall code, and the Filler used when a style is a name instead of a number.
- Press Save item name format. Items already in the POS keep their names.
Count the store
- Pick Counts in the left menu. A manager names the count, picks everything or one department or vendor, and presses Start count.
- Anyone can count: scan each piece's tag (or type it and press Enter), or type a number on a line.
- Use Not counted yet and Differences to see what's left. Pieces by tag lists pieces expected but not scanned, and pieces found that were marked sold or gone.
- A manager presses Post count. On hand becomes what you counted, pieces not scanned are marked lost, and you choose to leave uncounted lines alone or set them to 0. Extra pieces without a tag get new tags to print.
Cancel count leaves stock as it was.
Transfers between your stores
Managers who belong to two stores with the same owner see Transfers. Send stock marks it sent; the other store presses Mark received when it arrives. Ask for stock sends a request the other store can send.
For what your stock is worth, how old it is and what to reorder, managers can open Reports, Inventory value and What to buy.
Inventory on a past date
Inventory, On a past date: pick a day to see what was on hand at the end of it, with pieces, cost and retail by department and by vendor, and every item. Download for Excel saves it.
The POS works it out from the stock history: what is on hand now, less every change after that day (received, sold, returned, counted, adjusted, transferred, paid in full). Items added to the POS after that day are not counted, and stock brought in from BridalLive counts from the day it came in. Cost and retail are for managers and owners. Staff see pieces only. The owner can turn it off for staff in Settings, Staff and money (Staff can use Inventory on a past date, on by default); then it is not in the left menu and only managers and owners can open it.