Deposits, payments and refunds
Take a deposit or a payment by cash, check, card, gift card or store credit, and give money back.
Take a payment
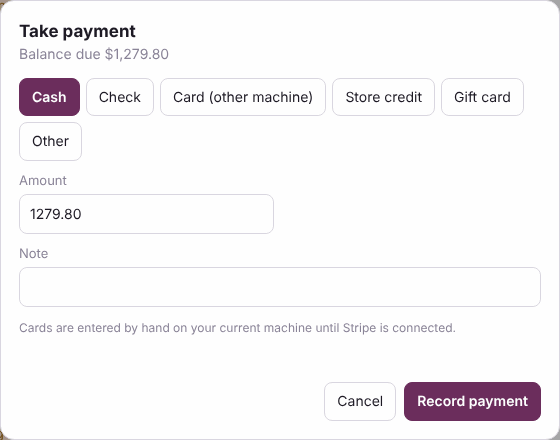
Press Take payment on the ticket. The checkout opens in its place, one step at a time: Pay, Sign (special orders, layaways and rentals not signed yet), Receipt, Done.
- What she owes is on the left: total, tax, paid so far, the deposit due and the balance.
- Due today starts on the deposit on a new special order or layaway, the plan payment on a payment plan, otherwise the full balance. Press Other amount to type your own.
- Press how she pays: Card on reader, Card (other machine), Cash, Check, Gift card or Store credit. The amount fills in. For cash, type what she handed you (or press a quick amount) and the change due shows. For a check type the check number; for a gift card the card number.
- Press Take $…. If there is still some left to pay today it stays on Pay with the rest filled in, so part card, part cash is two payments in a row. Split payment lets you type the first part before you choose how.
- Sign: she signs the agreement on the screen, or press Sign later.
- Receipt: Print, Email, Text or No receipt. The choice you make comes up first next time, on every register. A text goes only to a customer who said yes to texts.
- Done shows what was taken and the balance left. Press Next customer.
The payment that pays it off also lists Going home today: everything she can take now, ticked. Those are marked picked up with the payment, so the sale is done in one step. Untick anything she leaves with you. On the first payment of a ticket for a customer with no appointment today, it also asks how she came in. See Paid in full.
One payment for several tickets
She has her dress on layaway and just special ordered a veil: keep two tickets, take one payment.
- On her customer page press One payment for several tickets (it shows when she has two or more open tickets). From a ticket on the Register, press Pay with her other tickets.
- Tick the tickets and type how much goes on each. Pay off all fills in every balance. The total is at the bottom.
- Pick how she pays: Card reader (one swipe for the total), Cash, Check, Card (other machine), Other, or Pay link (one link for the total, sent by email or text, or copied).
- Press Take payment. Each ticket shows what it got and what it still owes. Press Combined receipt to print one receipt with every ticket on it.
Each ticket gets its own payment, so everything works per ticket: its balance, its payment plan, Going home today when that ticket is paid off (only that ticket's items), when the sale and commission count, QuickBooks, and its own receipt. When the store emails receipts, she gets one email with both tickets. The end-of-day close counts it as one payment.
Refunds are per ticket: open the ticket and refund as usual. A card refund goes back to the same card, up to what that ticket got from the swipe.
Offline: cash and check work without the internet. The payment is saved on the device and sent once when the internet is back. The card reader and pay links need the internet.
Deposits
Owners and managers set the deposit for special orders and layaways in Settings, Register (a percent of the total). It is only a suggestion; you can take any amount. Money taken on items that haven't left the store shows to managers as Deposits held on the Reports screen. It becomes a sale when she takes the item home.
Refunds
- Managers and owners: open the ticket and press Refund.
- Pick how the money goes back, enter the amount and a note, and press Record refund.
To take an item back, use Return instead, so the item goes back in stock. See Returns, exchanges, store credit and gift cards.
Payment plans
A special order or layaway can be paid off in parts. Payment plans are on the Shop plan and up (see Your plan).
- Open the ticket and press Set up payment plan.
- Pick Number of payments, Amount each or Pick dates, how often (every week, every 2 weeks, every month) and the first due date.
- Check the Paid in full by date. It starts at 6 weeks before the wedding, or the ship date if that comes first. No payment can fall after it.
- Check the schedule at the bottom (the payments always add up to the cent) and press Save plan.
The schedule shows on the ticket, on the receipt and agreement, and on the bride's own page. Every payment you take on the ticket goes to the oldest payment due first. Each payment shows as Paid, Partly paid, Due or Late (not paid by the end of its due day). Use Change plan to make a new schedule for what is left; the old one is kept in the history. Managers can Cancel plan.
To see everyone on a plan, pick Payment plans in the ticket list on the Register. Late ones are on top. Reminders before each payment and when one is missed are in Settings, Automations ("Payment plan: payment coming up" and "Payment plan: payment missed"). They are off until you turn them on, and never go to someone who said no to emails or texts.
What staff see
Everyone sees a bride's own ticket, payments and balance at the register. Only managers and owners see totals across tickets.