Tux rentals
Book tuxes for the whole groom’s side, collect sizes, order from the rental company, and check them out and back in.
Set up your packages
- Open Tux rentals and press Packages (managers and owners).
- Name the package, pick the rental company (or Our own stock), set the price, the damage waiver and what's in it (coat, pants, shirt, vest, tie, shoes...).
- If the groom rides free, set Groom free with to how many paid rentals it takes. Press Add package.
A rental company not in the list? Add it as a vendor under Order board, Vendors & pricing.
Book the party
- On the bride's or groom's customer page, add the men to the wedding party.
- Press Book tuxes for the groom’s side, pick the package and press Book them. Everyone on the groom's side without a rental gets one, each with its own ticket.
- For one person, press New rental on the Tux rentals screen instead. Pickup and return dates default to two days before and after his event.
Measure once
Type his measurements one time. The sizes go on his rental and on his rental ticket by themselves.
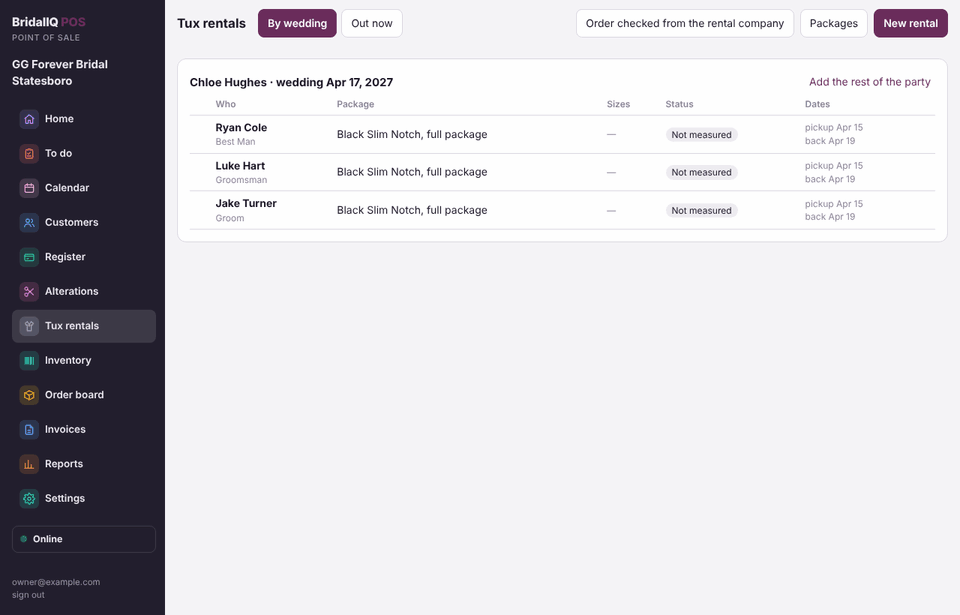
- On the wedding party (the bride's or groom's customer page), press Measure next to his name, or use Add measurements on his own page or on his rental. Each man who still needs measuring shows not measured.
- Enter chest, waist, outseam (or inseam), neck, sleeve, height and shoe size, then Save. Coat, pants, shirt, vest and shoe sizes are filled in from them: coat from the chest with the length from his height (42R), pants waist by length (34x42), shirt neck and sleeve (15.5-34), vest by chest.
- Press Create rental tickets for everyone measured on the party to book everyone measured in one go, each with his own ticket and his sizes. Anyone not measured yet is listed so you can measure him next.
Measurements on the party (or on the Tux rentals screen) shows who is measured, his sizes, and what is still missing, like Missing: Neck, Sleeve. A rental with a piece that has no size shows No size.
The sizes are a starting point: change any of them on his rental. If he is measured again, his open rentals take the new sizes (with a note on the rental), except a size you typed over, until the order goes to the rental company. After that the sizes stay as ordered and the rental gets a note to check them with the company.
Size charts: under Packages, press Size charts to set each rental company's chart (sizing the coat up, pants by outseam or inseam, coat lengths by height, vest sizes by chest). Without one, the usual chart is used.
Sizes and ordering
- Check his sizes on his rental (they come from his measurements) and change any that need it. Save.
- Tick the rentals to order and press Order checked from the rental company. A purchase order is made for that company; send it and receive it like any purchase order.
Pickup and return
- When he picks it up, press Picked up. If he still owes money, the POS asks first. The rental counts as sold that day.
- When it comes back, press Returned. Check every piece, add a late fee or a damage or missing-piece fee, and note the condition.
- Any fees go on his ticket so you can take payment.
Out now lists every tux that is out.
Print the wedding party
On the bride's (or groom's) customer page, each wedding has Print wedding party. It prints one clean page with everyone in the party, their role and side, their sizes and latest measurements, and what each has ordered or rented and where it stands (ordered, received, ready, picked up). No prices are on it, so anyone can print it for the party.